How To Create Reaction Roles
This guide will walk you through the process of creating a message that allows users to assign themselves roles by reacting on a message.
Here is the step-by-step process for creating a reaction role message.
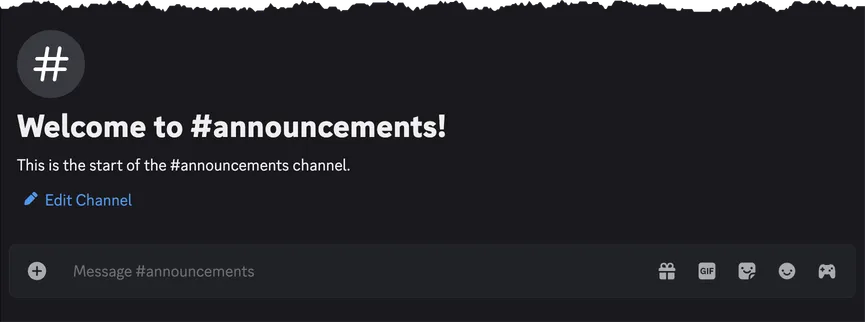
1. Choose the channel where you want to have the reaction role message
Section titled “1. Choose the channel where you want to have the reaction role message”- Either create a new channel, or choose an existing channel to have the reaction role message in.
2. Create the reaction role message
Section titled “2. Create the reaction role message”- Create a new message or find an existing message in the channel chosen above to use for the reaction role message.
- Your message should give your users a clear description of the purpose of the reaction roles.
- You can use any type of message, such as plain text, an embed, or an image.
- Tip: If you have Reaction Roles Premium, you can use the
/embedcommand to create an embed.
- Tip: If you have Reaction Roles Premium, you can use the
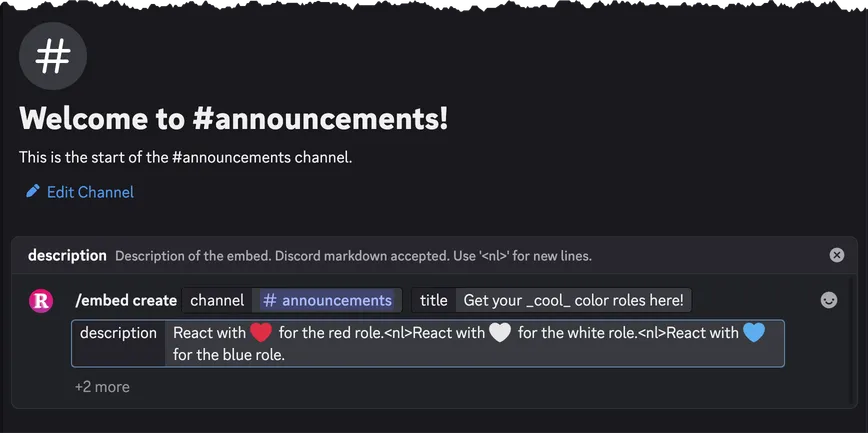
Here’s an example of creating an embed using the /embed command to use with reaction roles:
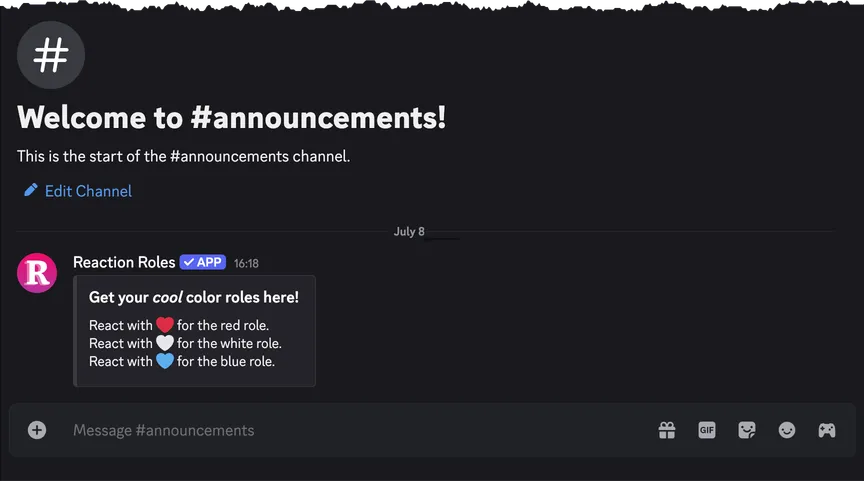
And the resulting embed message to use with reaction roles:
3. Add reaction roles to the message
Section titled “3. Add reaction roles to the message”- Use the
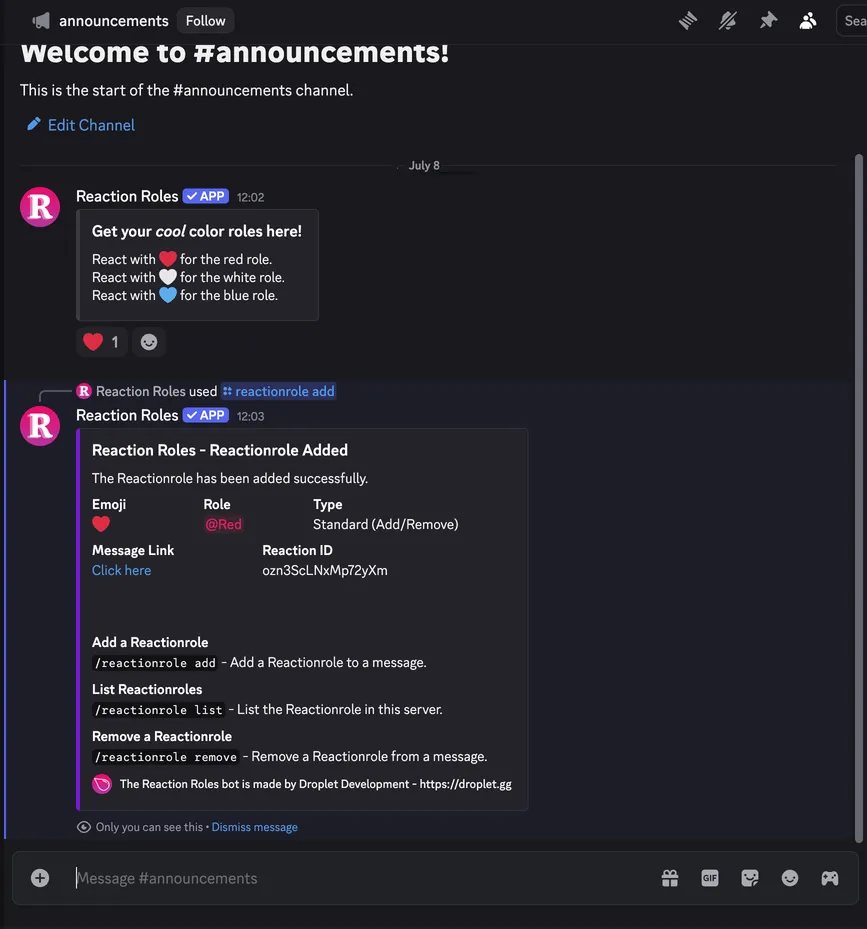
/reactionrole addcommand to add a reaction role to the message. - You will need to provide:
- The emoji to use for the reaction role.
- The role to give the user when they react with the emoji.
- The type of reaction role. See also: What are the different types of reaction roles?
- The message link of the message to which the reaction role will be added. See also: What is a message link and how to get one?
Here’s an example of adding a reaction role:
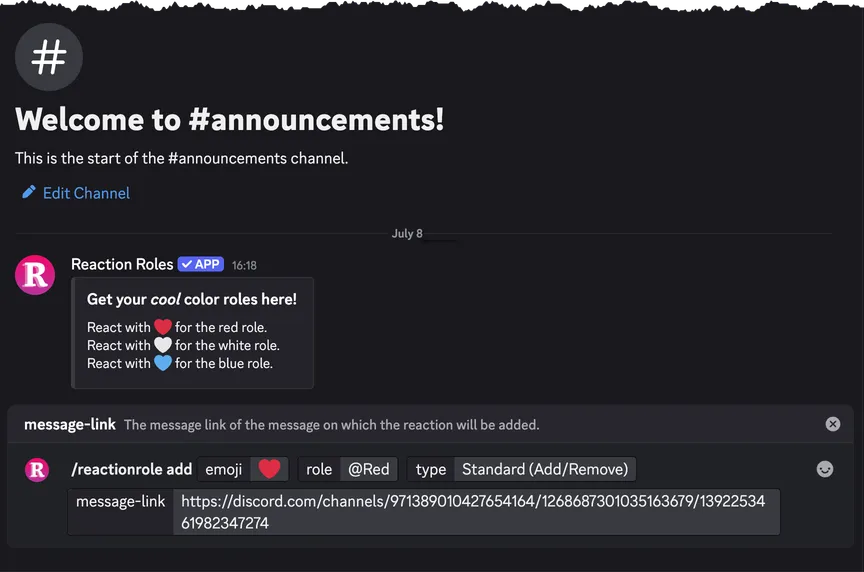
And the resulting reaction role:
Add as many reaction roles as you need to the message, but note that both Discord and the Reaction Roles bot have usage limitations.
4. Test out your reaction roles
Section titled “4. Test out your reaction roles”Before letting your members use the reaction roles, it is a good idea to test them out yourself.
- React to the message with the emoji used for the reaction role.
- Check if the role was assigned to you.
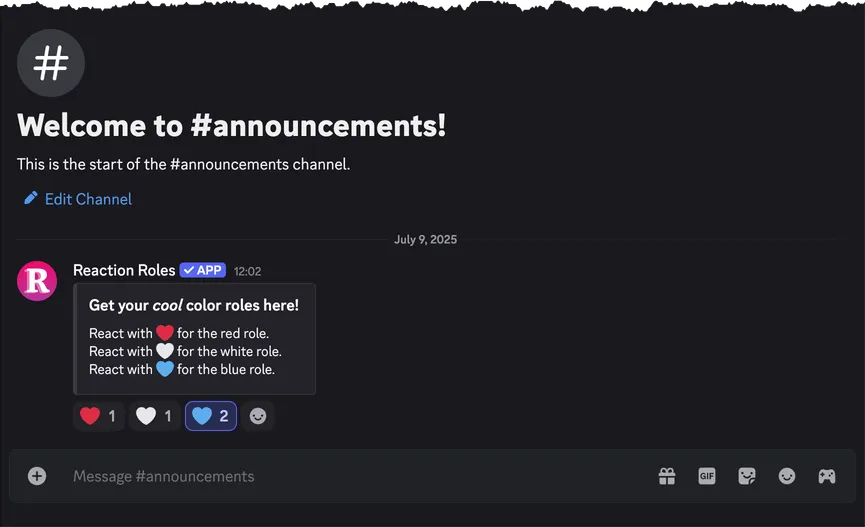
Once all of your reaction roles have been tested by you or another trusted member, open them up to all your users and have fun!
Commands | FAQ | Documentation | Premium
Privacy Policy | Terms of Service | Contact Support
© 2025 Botsy LLC. All rights reserved.